Generate invoices in seconds and import all sales channel transactions. Track payments and ship packages instantly
Orders
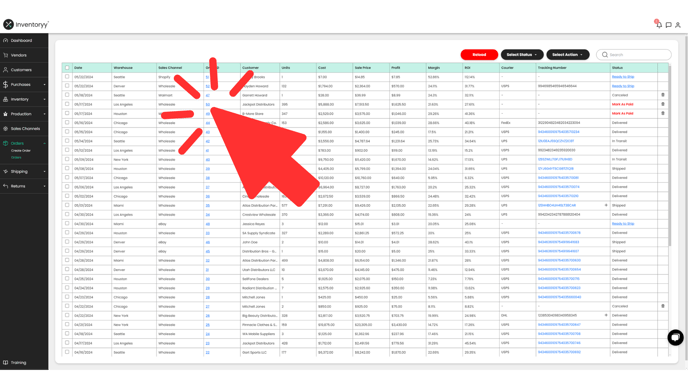
From the Orders page, select the black dropdown button in the top right corner titled “Select Action”, then select “Create Order”
- This will take you to the Create Order page
- You can also get to the Create Order page by clicking “Create Order” in the sidebar

You can edit an order from the Create Order page, or by clicking on the Order ID hyperlink on the Orders page once the order has been created.

Delete Order
To delete an order, click on the far right (trash can) button on the Orders page.
- You will then be asked, “Are you sure you want to delete this order from your inventory?” Click “Yes” to confirm or “No” to cancel

Start URL: inventoryy.com/inventory-management/orders/create-order
From the dashboard, navigate on the sidebar to Orders < Create Order

From the Orders page, select the black dropdown button in the top right corner titled “Select Action”, then select “Create Order”
This will take you to the Create Order page
Create Order
To create an order, start by entering the following information in the top left corner of the page:
- Date
- Customer
- Email Address
- Phone Number

Next, enter the following information for the Billing Address and Mailing Address:
- Street
- City
- State
- Zip Code
- Country/Region
You can also check the box “Same as Billing Address” to auto-fill the Mailing Address as the same Billing Address

The Order ID represents the specific ID for the order, which is auto-generated but can also be edited

Bulk upload multiple products by SKU or Unique Identifier
- Scan barcodes or input SKU numbers to quickly add products to a purchase order

Manually input the following to add products to each order:
- Warehouse
- SKU
- Brand
- Model
- Condition
- Notes
- Unique Identifier
- Quantity
- Cost Per Unit
- Price Per Unit

For faster Order creation, use the Bulk Apply features to apply a Warehouse, Quantity and Sale Price
To apply a Warehouse to all of the products first select the products by checking the boxes to the left-hand side
Select a Warehouse in the dropdown, then click "Apply All"
Apply the Quantity you have in stock and Sale Price set on the Products page
Again, select the products by checking the boxes to the left-hand side then click "Apply Quantity" and "Apply Sale Price"
Once the product information is complete, enter the following shipping information (if applicable):
- Courier
- Shipping Method
- Tracking Number

Add any additional notes that you wish to mention for this order in the Notes section

View the Units section to see the total number of units in the order

Add a shipping amount to charge to the customer in the Shipping section

To add a sales tax to the order, enter either the dollar amount in the "Enter Tax" section or the Rate (%) in the "Enter Rate(%)" section

View the Total section to see the total dollar amount for the order

To download or print a PDF version of the order, click the "Download Invoice" button

To save a draft of the order, click the "Save Draft" button
You must first fill in all of the customer name to save the draft

Select a Payment Method for the order
Once the information is complete, click the "Create & Send" to complete the Order
By clicking "Create & Send" the Order will be created and an email of the invoice will be sent to the customer
By clicking "Create Invoice" the Order will be created without sending an email to the customer

