Get real-time commercial quotes for shipments. Purchase labels, print pick lists and generate scan forms.
Create Label Page
Start URL: inventoryy.com/inventory-management/shipping/create-label
From the dashboard, navigate on the sidebar to Shipping > Create Label

Shipping Balance
Shipping Balance displays the current dollar amount you have in your shipping account
.png?width=688&height=387&name=Untitled%20design%20(31).png)
Sender Information
Sender Information displays the Sender Address that will display on the label
- Enter Sender's Address here (Street, City, State, Zip Code, and Country/Region)
.png?width=688&height=387&name=Untitled%20design%20(32).png)
Order Details
Order Details displays the Customer, Order ID, and Shipment ID
- Enter Customer and Order ID information; Shipment ID will be auto-filled but can be edited
.png?width=688&height=387&name=Untitled%20design%20(33).png)
Recipient Information
Recipient Information displays the recipient’s Name, Company, Address, Email, and Phone Number
- Enter the Name, Company, Street, City, State, Zip Code, Country, Email, and Phone Number of the recipient
.png?width=688&height=387&name=Untitled%20design%20(34).png)
Once completed, click the red “Next” button in the top right corner of the page
.png?width=688&height=387&name=Untitled%20design%20(35).png)
Shipment Information
Enter the following package information:
- Package Type
- Length (in.)
- Width (in.)
- Height (in.)
- Weight (lbs or oz)
.png?width=688&height=387&name=Untitled%20design%20(36).png)
Packaging Types include:
Your Own Packaging
USPS Priority Small Flat Rate Box
USPS Priority Mail Medium Flat Rate Box
USPS Priority Mail Large Flat Rate Box
USPS Priority Mail Flat Rate Envelope
USPS Priority Mail Legal Flat Rate Envelope
USPS Priority Mail Padded Flat Rate Envelope
USPS Priority Mail Express Flat Rate Envelope
USPS Priority Mail Express Legal Flat Rate Envelope
UPS Express Envelope, UPS Small Express Box
UPS Medium Express Box
UPS Large Express Box
UPS Express Tube
UPS Express Pak
.png?width=688&height=387&name=Untitled%20design%20(37).png)
Once these fields have been filled, Shipping Quotes will auto-populate on the right side of the screen.
.png?width=688&height=387&name=Untitled%20design%20(38).png)
Next, enter the Package Value ($)
.png?width=688&height=387&name=Untitled%20design%20(39).png)
Select the options for Insurance, Signature Confirmation and Hazardous Materials
- Select the amount of insurance you would like for the package; signature confirmation is auto-filled for $3.40
.png?width=688&height=387&name=Untitled%20design%20(40).png)
Add info for international shipping if applicable
.png?width=688&height=387&name=Untitled%20design%20(41).png)
Customs Info represents the Contents Type/Explanation, Restriction Type/Comments, Non-Delivery Action, EEL or PFC, Description of item, Quantity, Total Value, Currency, Total Weight, Harmonized Tariff Scheduled, Product Identifier and Origin Country for each international shipment
-png-1.png)
To add another package, click the black “Add Shipment” button just below the first shipment
.png?width=688&height=387&name=Untitled%20design%20(42).png)
Fill in all of the fields for the additional shipment
To delete a shipment, click the (-) button on the far right side of the shipment details.png?width=688&height=387&name=Untitled%20design%20(43).png)
Once the shipment details are complete and a shipping quote has been selected, click the red “Next” button in the top right corner of the page
.png?width=688&height=387&name=Untitled%20design%20(44).png)
You will now be able to view a summary of the shipment details.
The total amount due will display in the “Total Due” column on the bottom left corner of the page
.png?width=688&height=387&name=Untitled%20design%20(45).png)
Select a Payment Method, just below the details, and click the red “Buy Labels” button to purchase the labels
.png?width=688&height=387&name=Untitled%20design%20(46).png)
From here, you have the option to download and/or print the labels
.png?width=688&height=387&name=Untitled%20design%20(47).png)
Create Shipping Label (Shipments Page)
Starting URL: inventoryy.com/inventory-management/shipping/create-shipping-label
From the Shipments page, select an order by clicking on the box in the far left-hand column, then clicking “Select Action”, “Create Shipping Label”
.png?width=688&height=387&name=Untitled%20design%20(48).png)
Select Preset
Select Preset button represents a preset of package information to expedite the entering of shipping information
- Click the Select Preset button to select, edit, remove or create a new preset
.png?width=688&height=387&name=Untitled%20design%20(49).png)
When creating a new preset you will have to enter:
- Preset Name
- Shipping From
- Shipping Service
- Length
- Width
- Height
- Weight (lbs or oz)
- International Shipping
- Customs Information
- Signature Confirmation
- Insurance
- Hazardous Materials
.png?width=688&height=387&name=Untitled%20design%20(50).png)
Once a preset has been selected, click “Apply Preset” to apply the preset
.png?width=688&height=387&name=Untitled%20design%20(51).png)
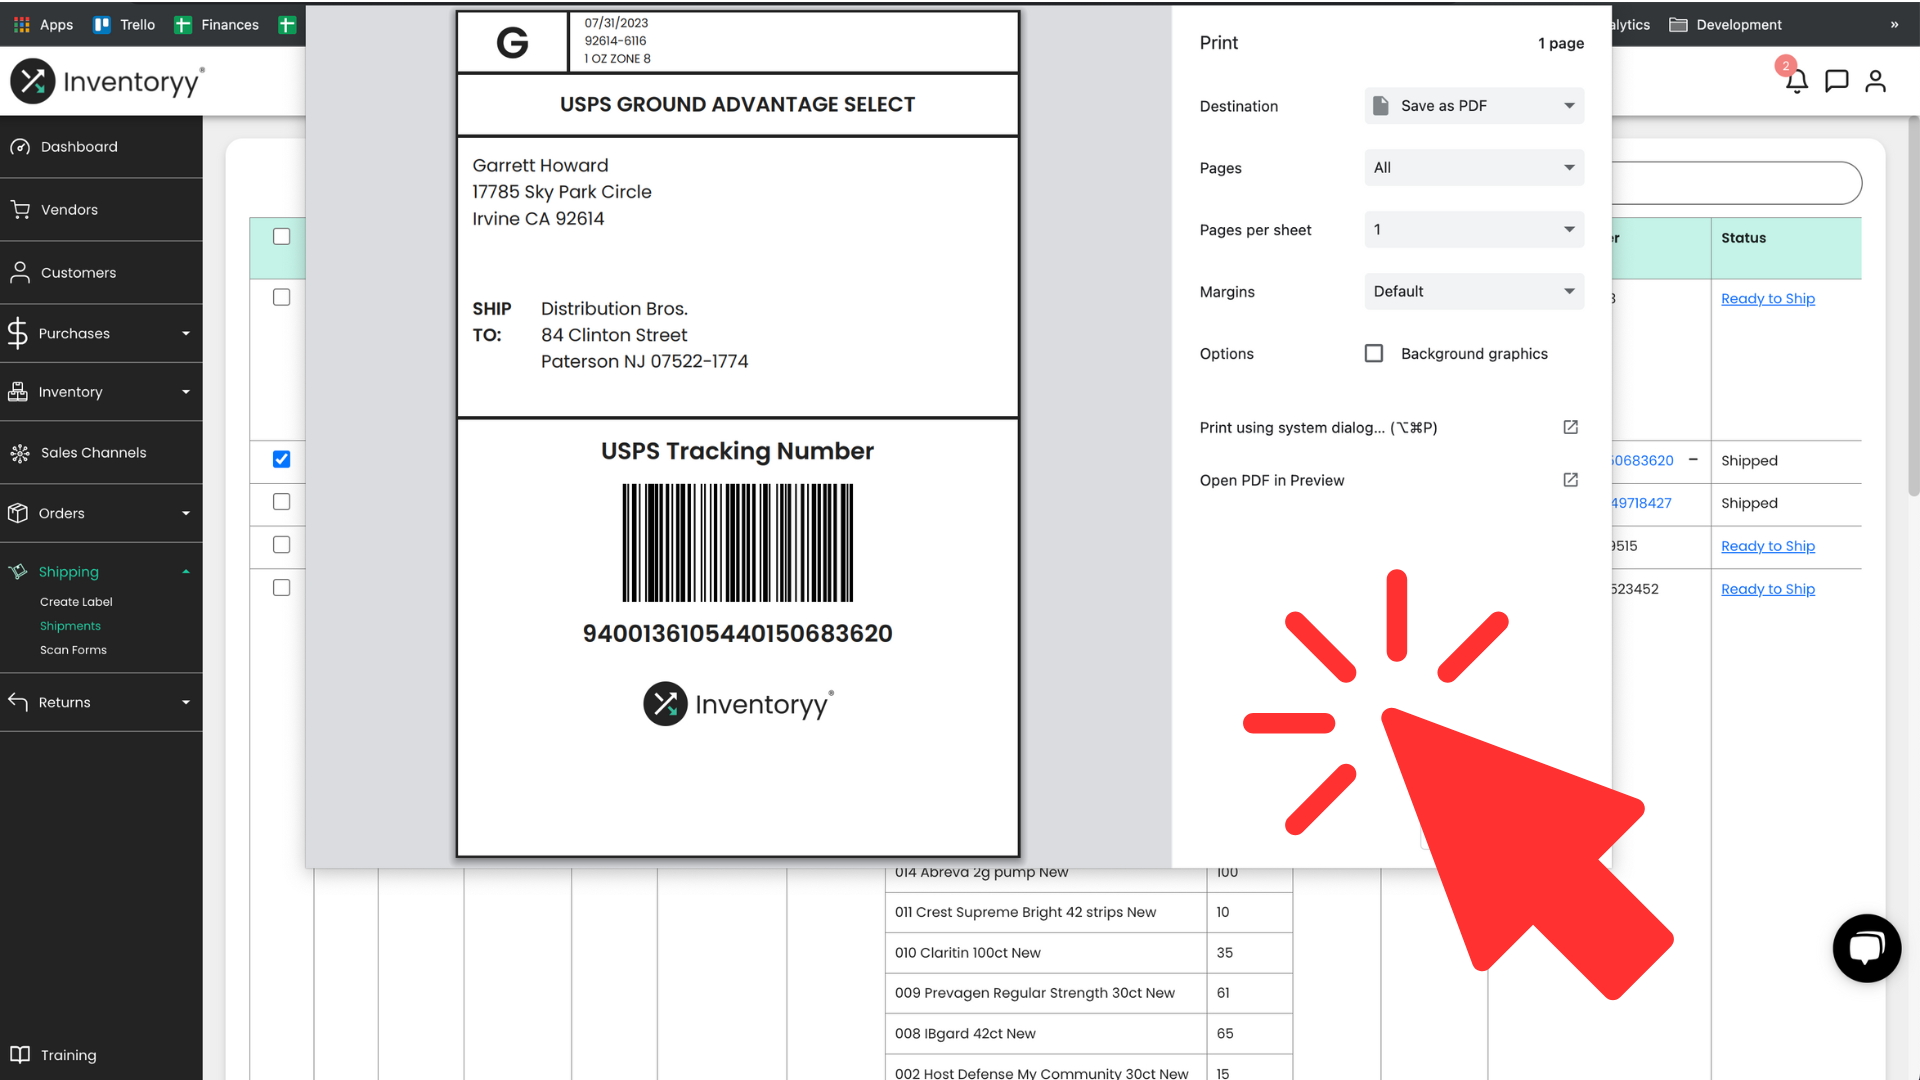
Print Shipping Label
Once the shipment information has been entered, click the “Print Shipping Label” button to download or print the shipping label
-png.png)
-png.png)
-png.png)
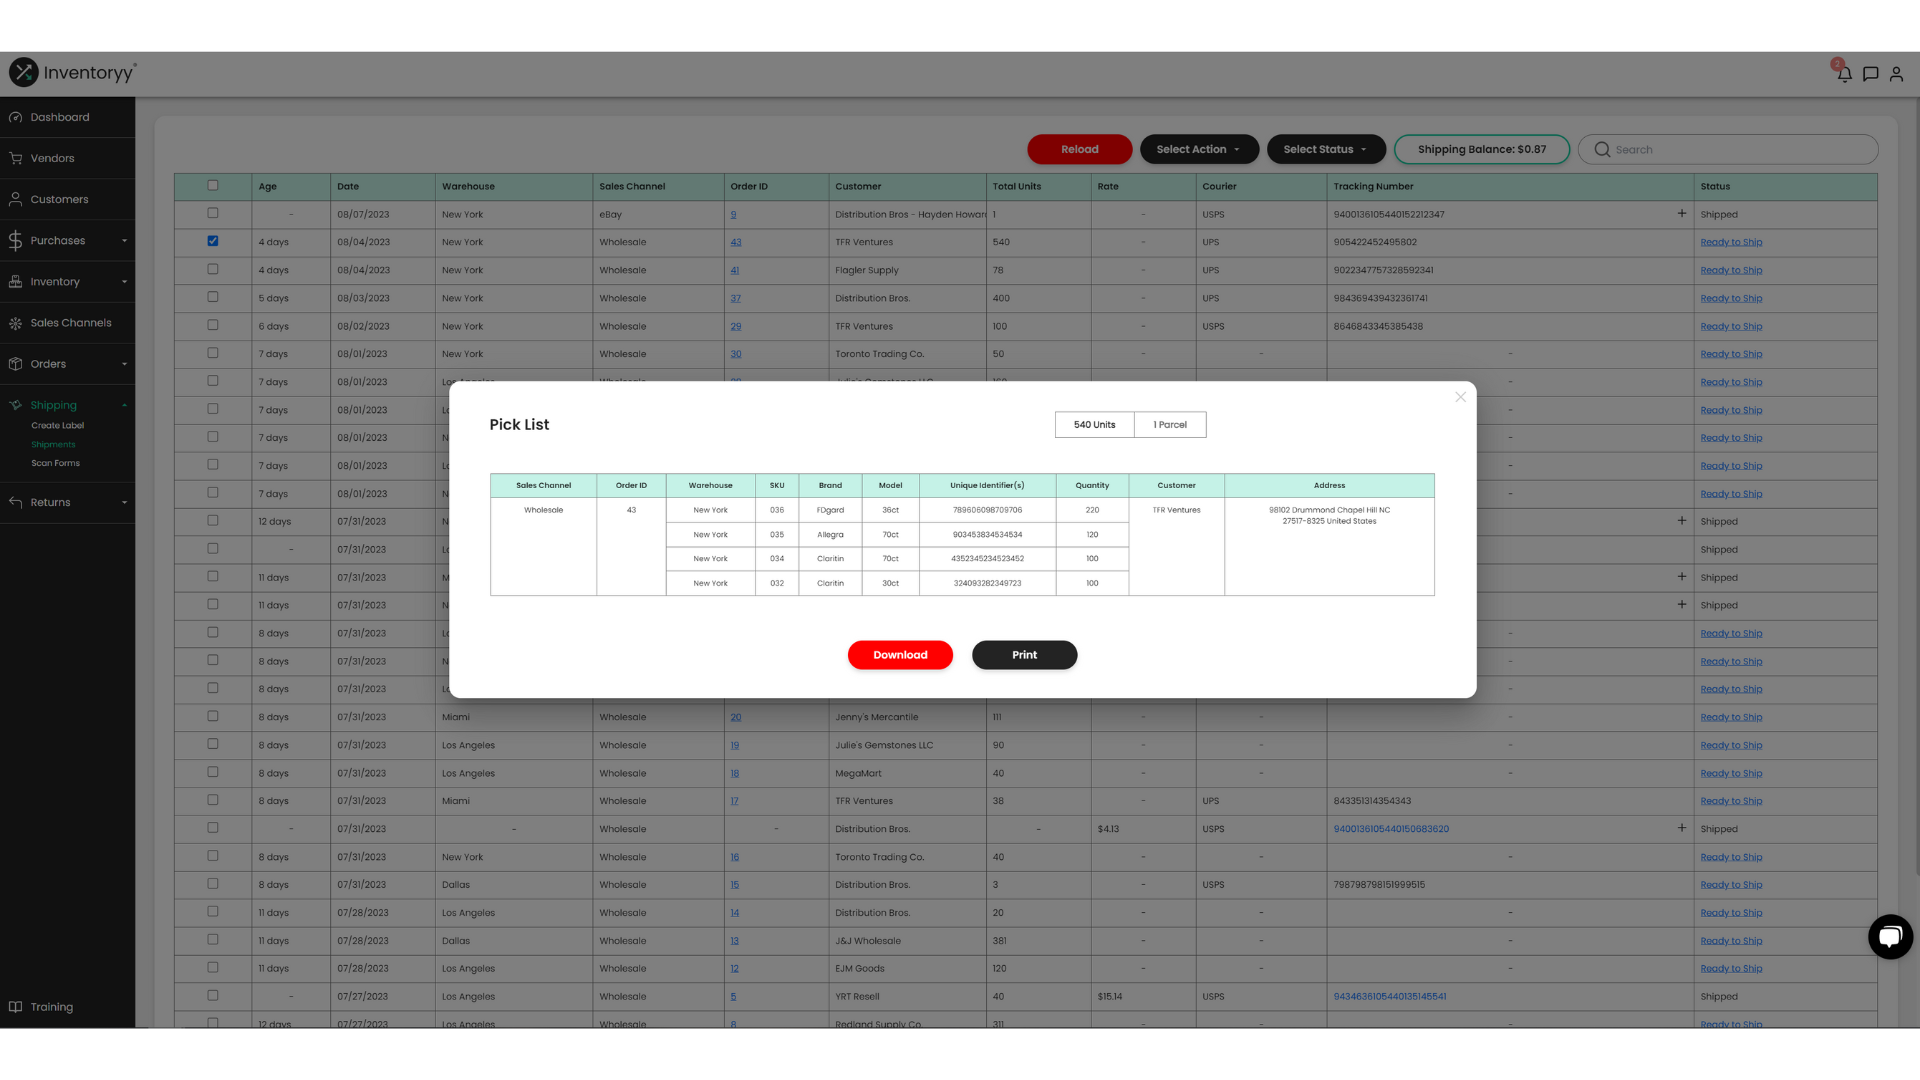
Print Pick List
Click the “Print Pick List” button to download or print the pick list
-png.png)
Shipping Balance
Shipping Balance represents the total dollar amount remaining in your shipping account
.png?width=688&height=387&name=Untitled%20design%20(52).png)
Age
Age column represents the number of days since each order was created
Date
Date column represents the date that the order was created
Sales Channel
Sales Channel column represents which sales channel the products in each shipment were sold on
Order ID
Order ID column represents the order that makes up each shipment (hyperlink)
- By clicking the hyperlink of the Order ID, you will be redirected to the “Create Order” page, which displays the details of the order
.png?width=688&height=387&name=Untitled%20design%20(53).png)
Quantity
Quantity column represents the number of units in each order
Sale Price
Sale Price column represents the total dollar amount of each order
Customer
Customer column represents the customer that purchased the order
From Address
From Address column represents the address that the order was shipped from
- Click on the “From Address” to select an address
-png.png)
Address
Address column represents the address that the order was shipped to
Shipping Details
Shipping Details column represents the Package Type, Dimensions and Hazard Materials option for each shipment
- Click on the “Add” button in the Shipping Details column to input the details for the shipment
-png.png)
-png.png)
Customs Info
Customs Info column represents the Contents Type/Explanation, Restriction Type/Comments, Non-Delivery Action, EEL or PFC, Description of item, Quantity, Total Value, Currency, Total Weight, Harmonized Tariff Scheduled, Product Identifier and Origin Country for each international shipment
- Click “Add Info” in the Customs Info column to input the details for the international shipment
-png.png)
-png.png)
Delivery Timeframe
Delivery Timeframe column represents the expected number of days for the shipment to arrive
Shipping Quotes
Shipping Quotes column represents the shipping quotes based on previously input information
- Click on this column to choose which shipping method you would like to use
-png.png)
Signature Confirmation
Signature Confirmation column represents the option for choosing whether or not you would like to include a signature confirmation with the shipment
- Click the box in the Signature Confirmation column to select or deselect the option for signature confirmation
-png.png)
Insurance
Insurance column represents the option for choosing whether or not you would like to include insurance with the shipment
- Click the box in the Insurance column to select or deselect the option for insurance
-png.png)
Reprint Label
Select "Reprint Label" under Shipments to reprint any shipping label.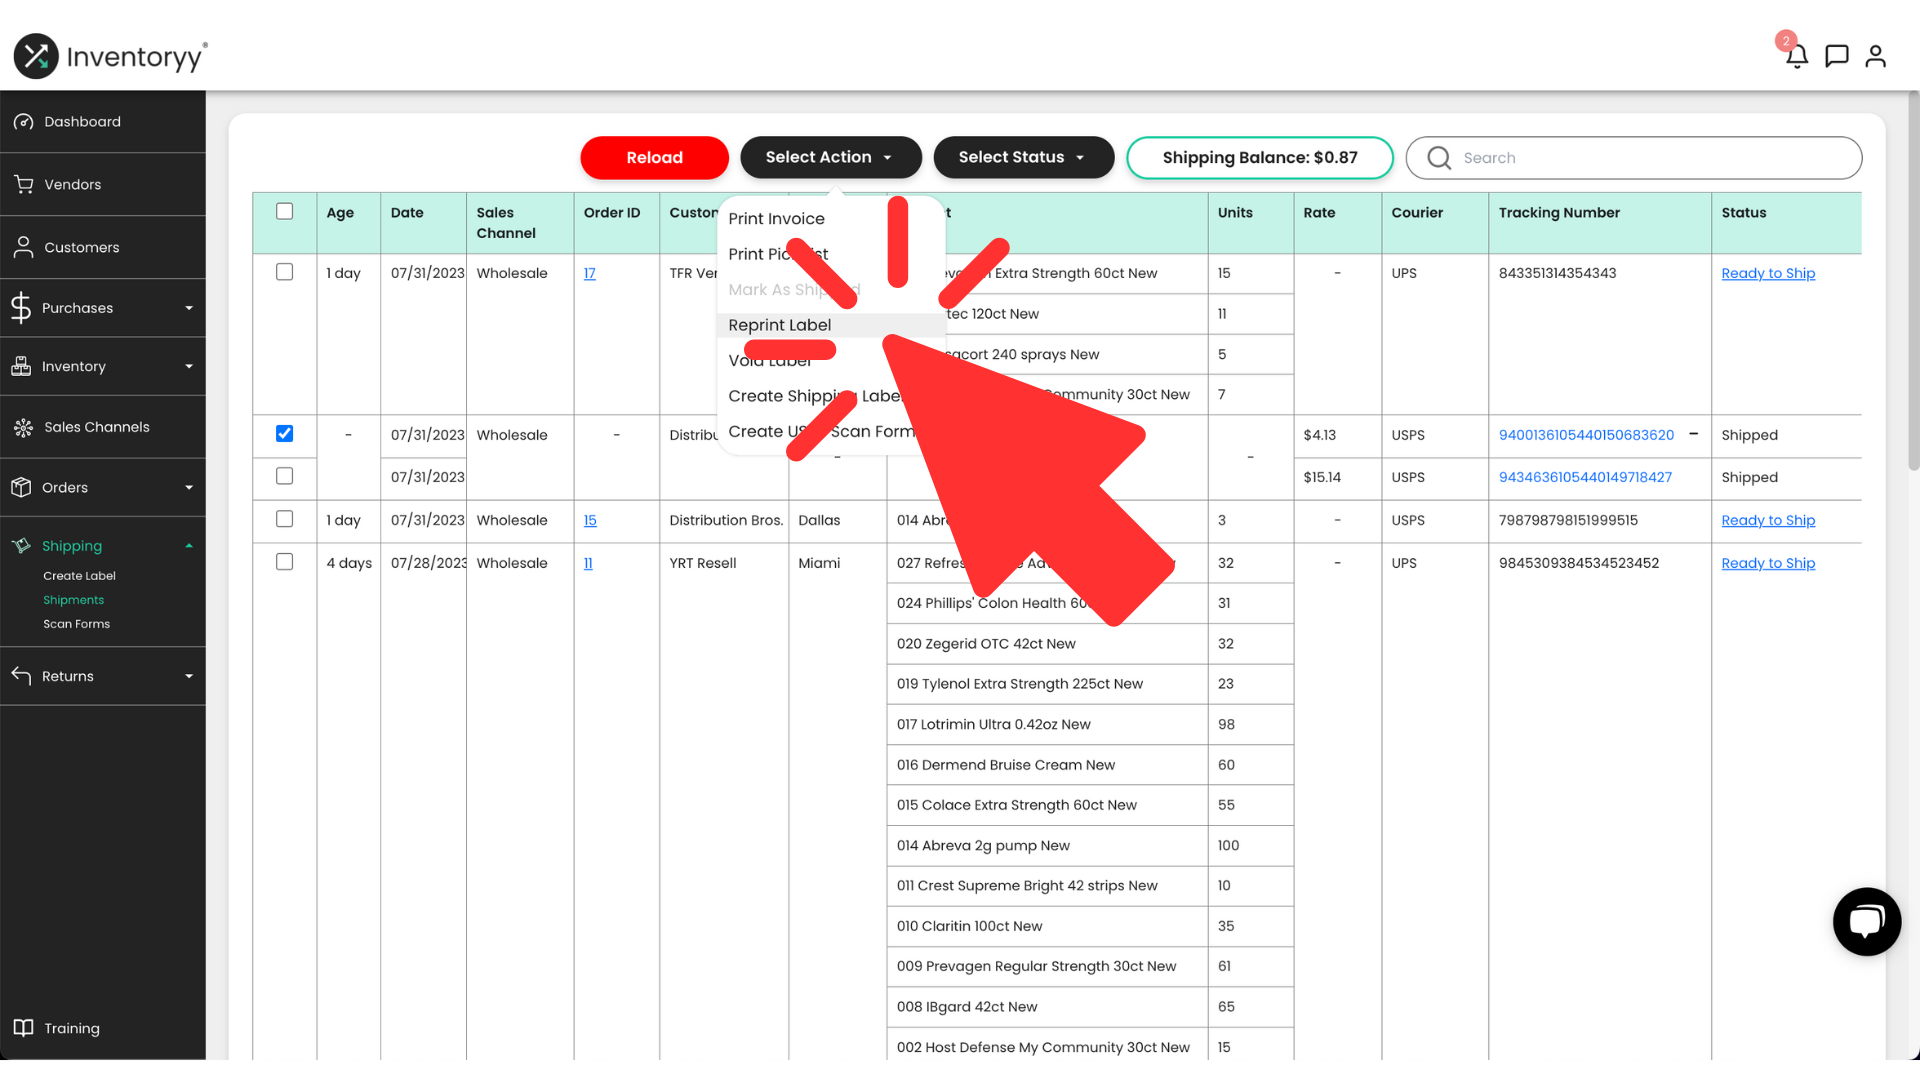
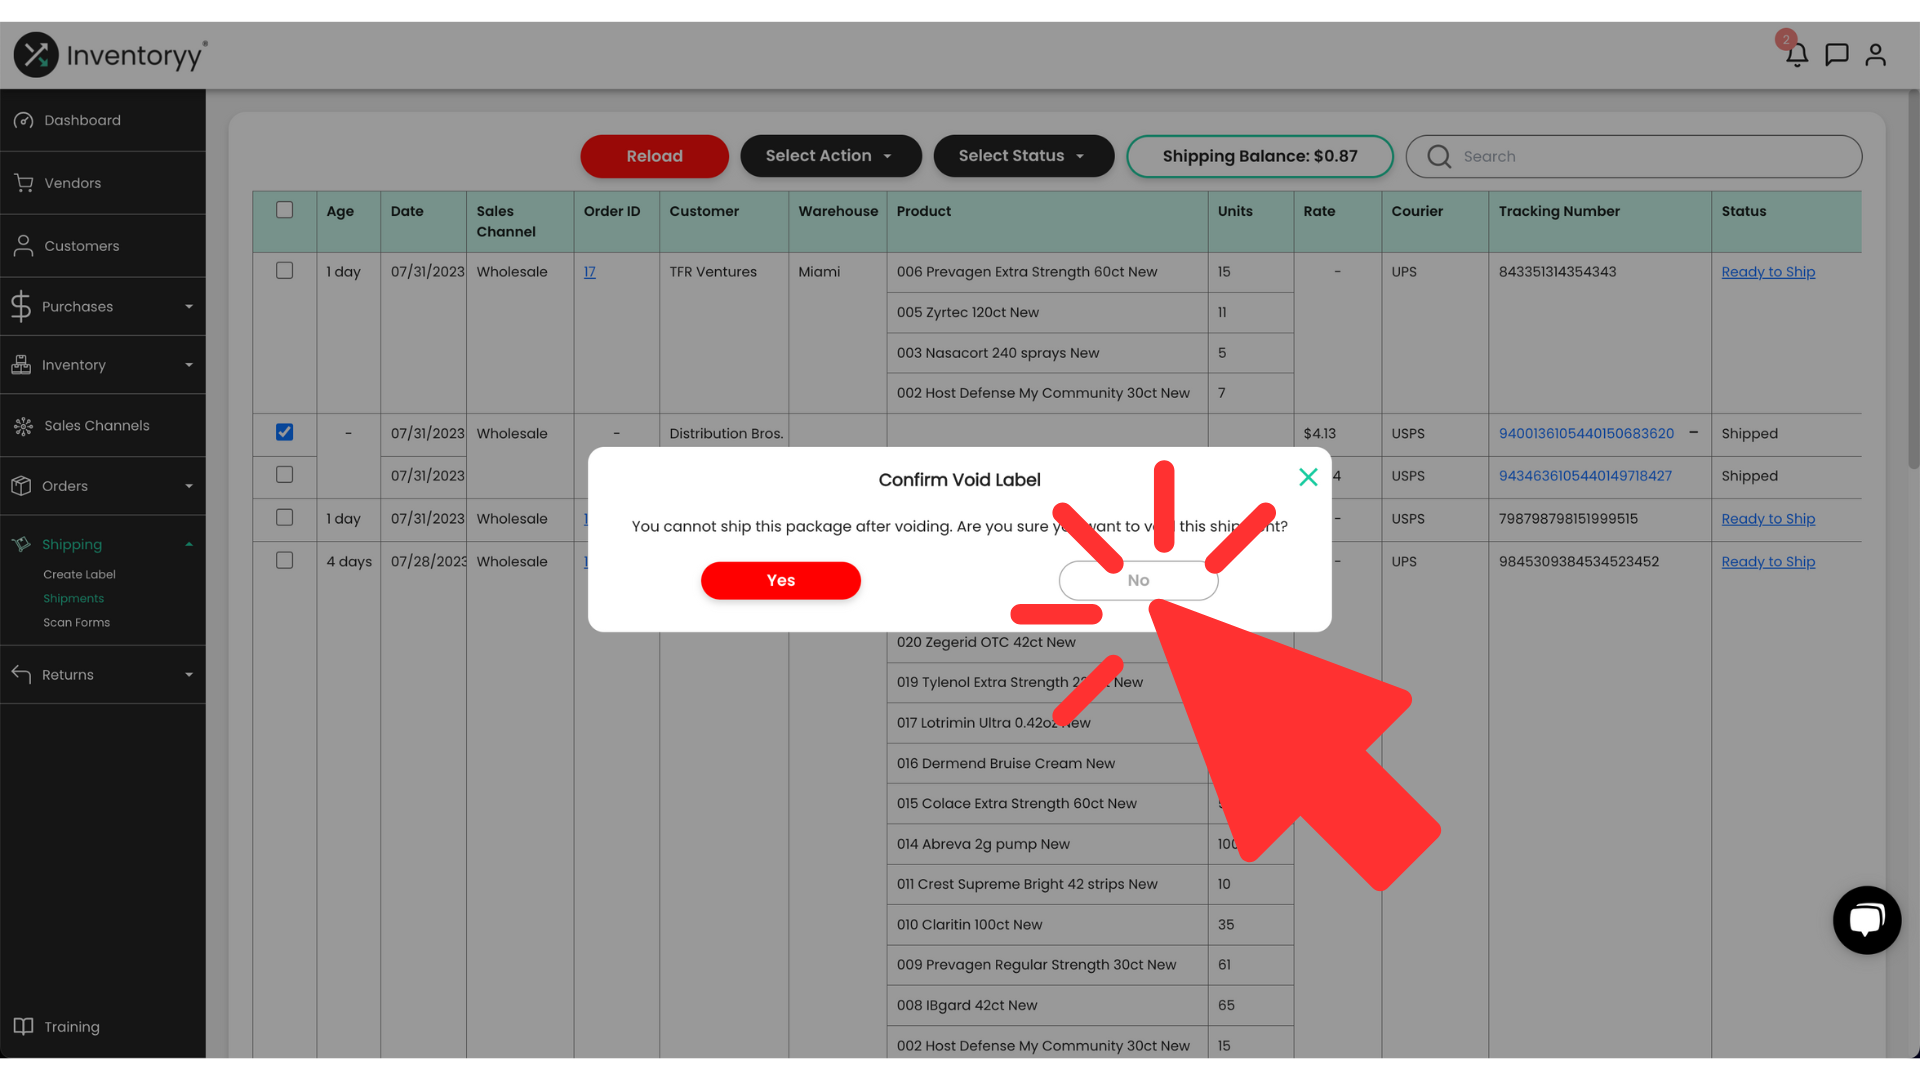
Void Label
Select "Void Label" under Shipments to void a shipping label.
A shipping label cannot be voided if the shipment has already been scanned by USPS.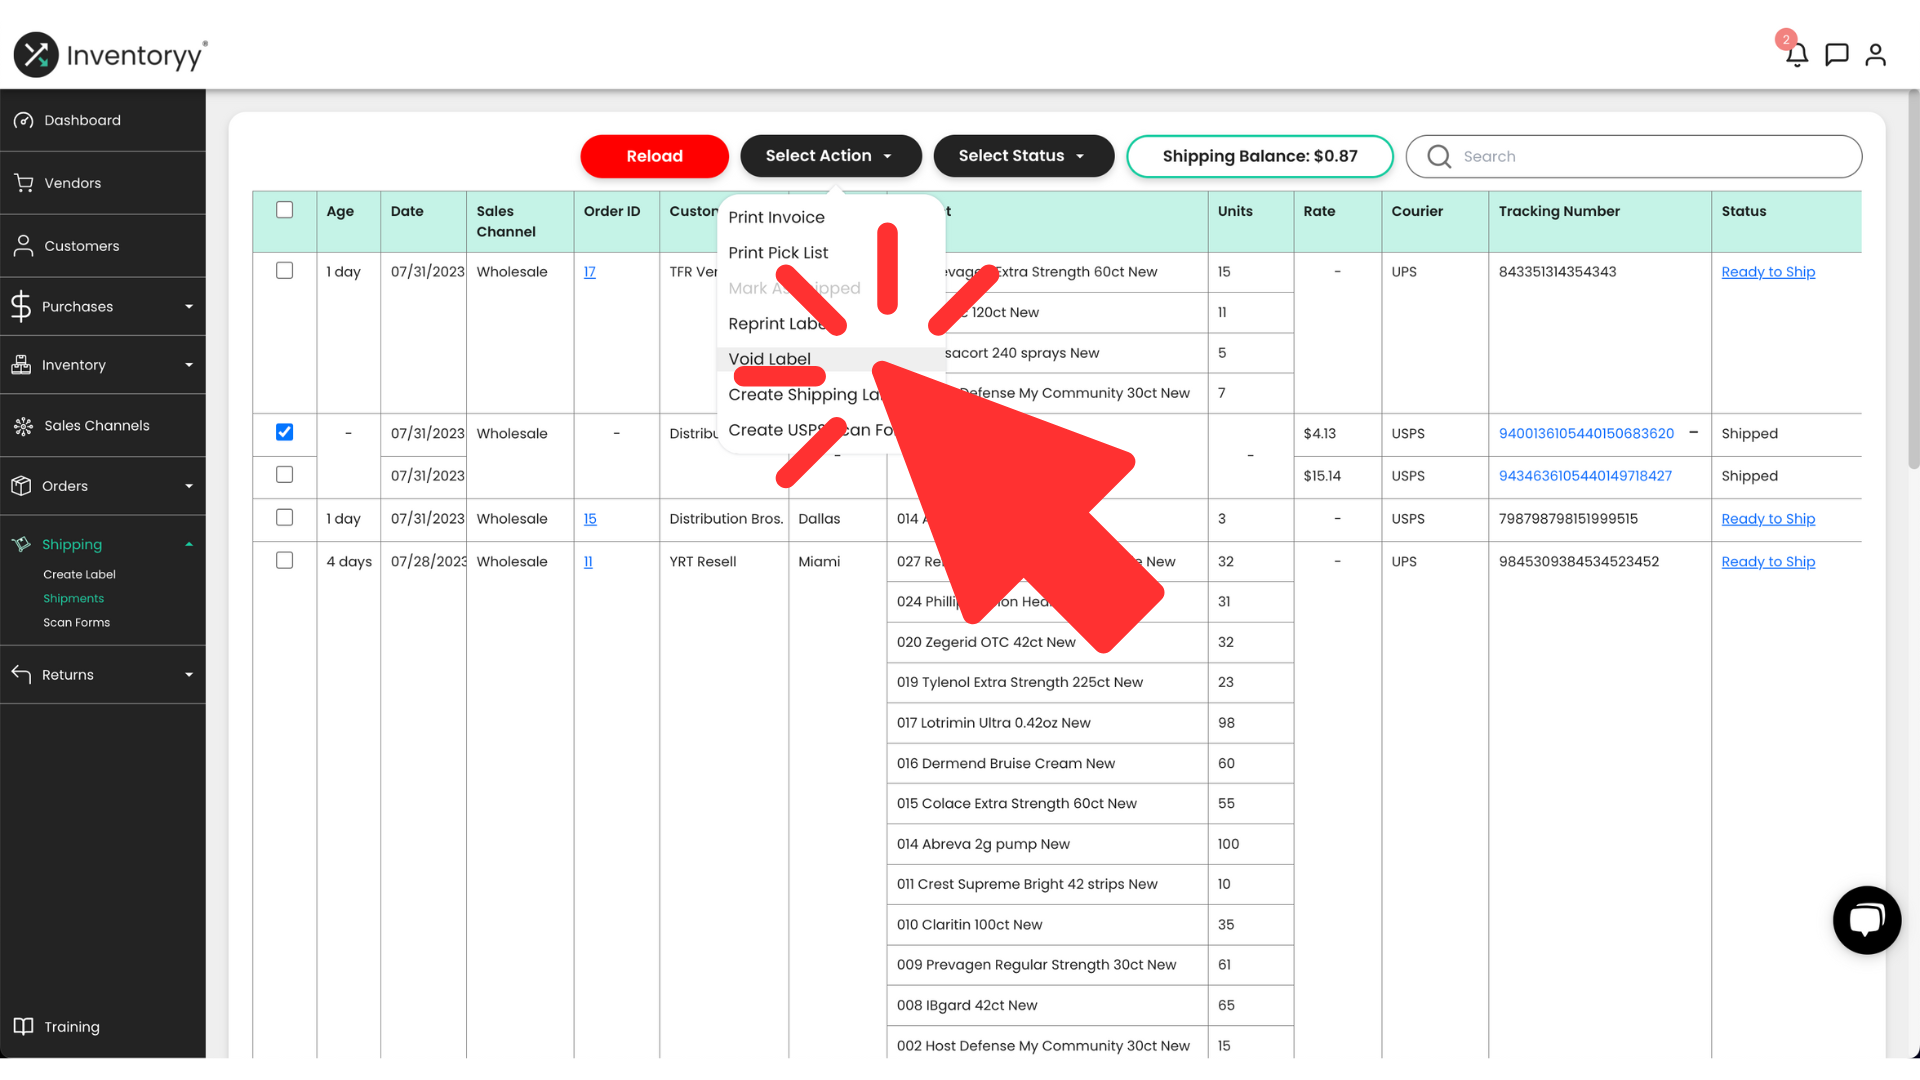
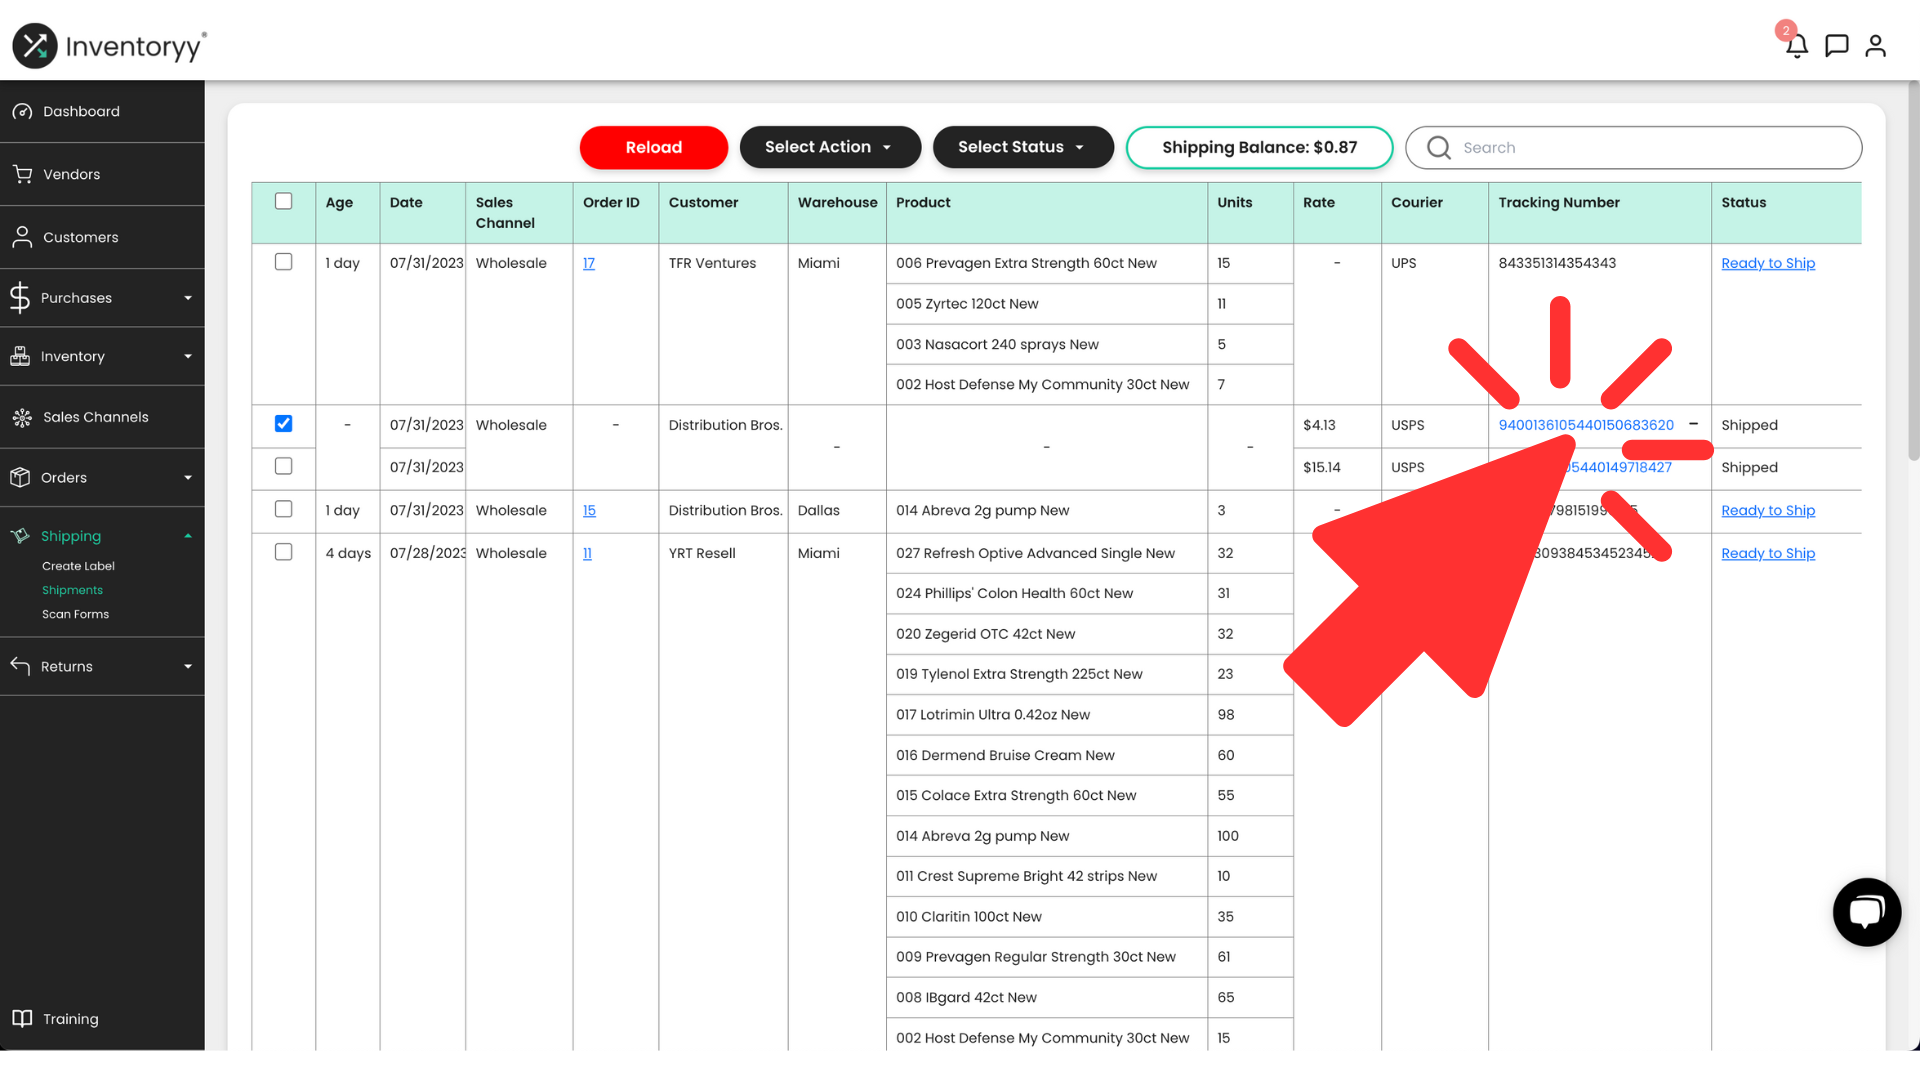
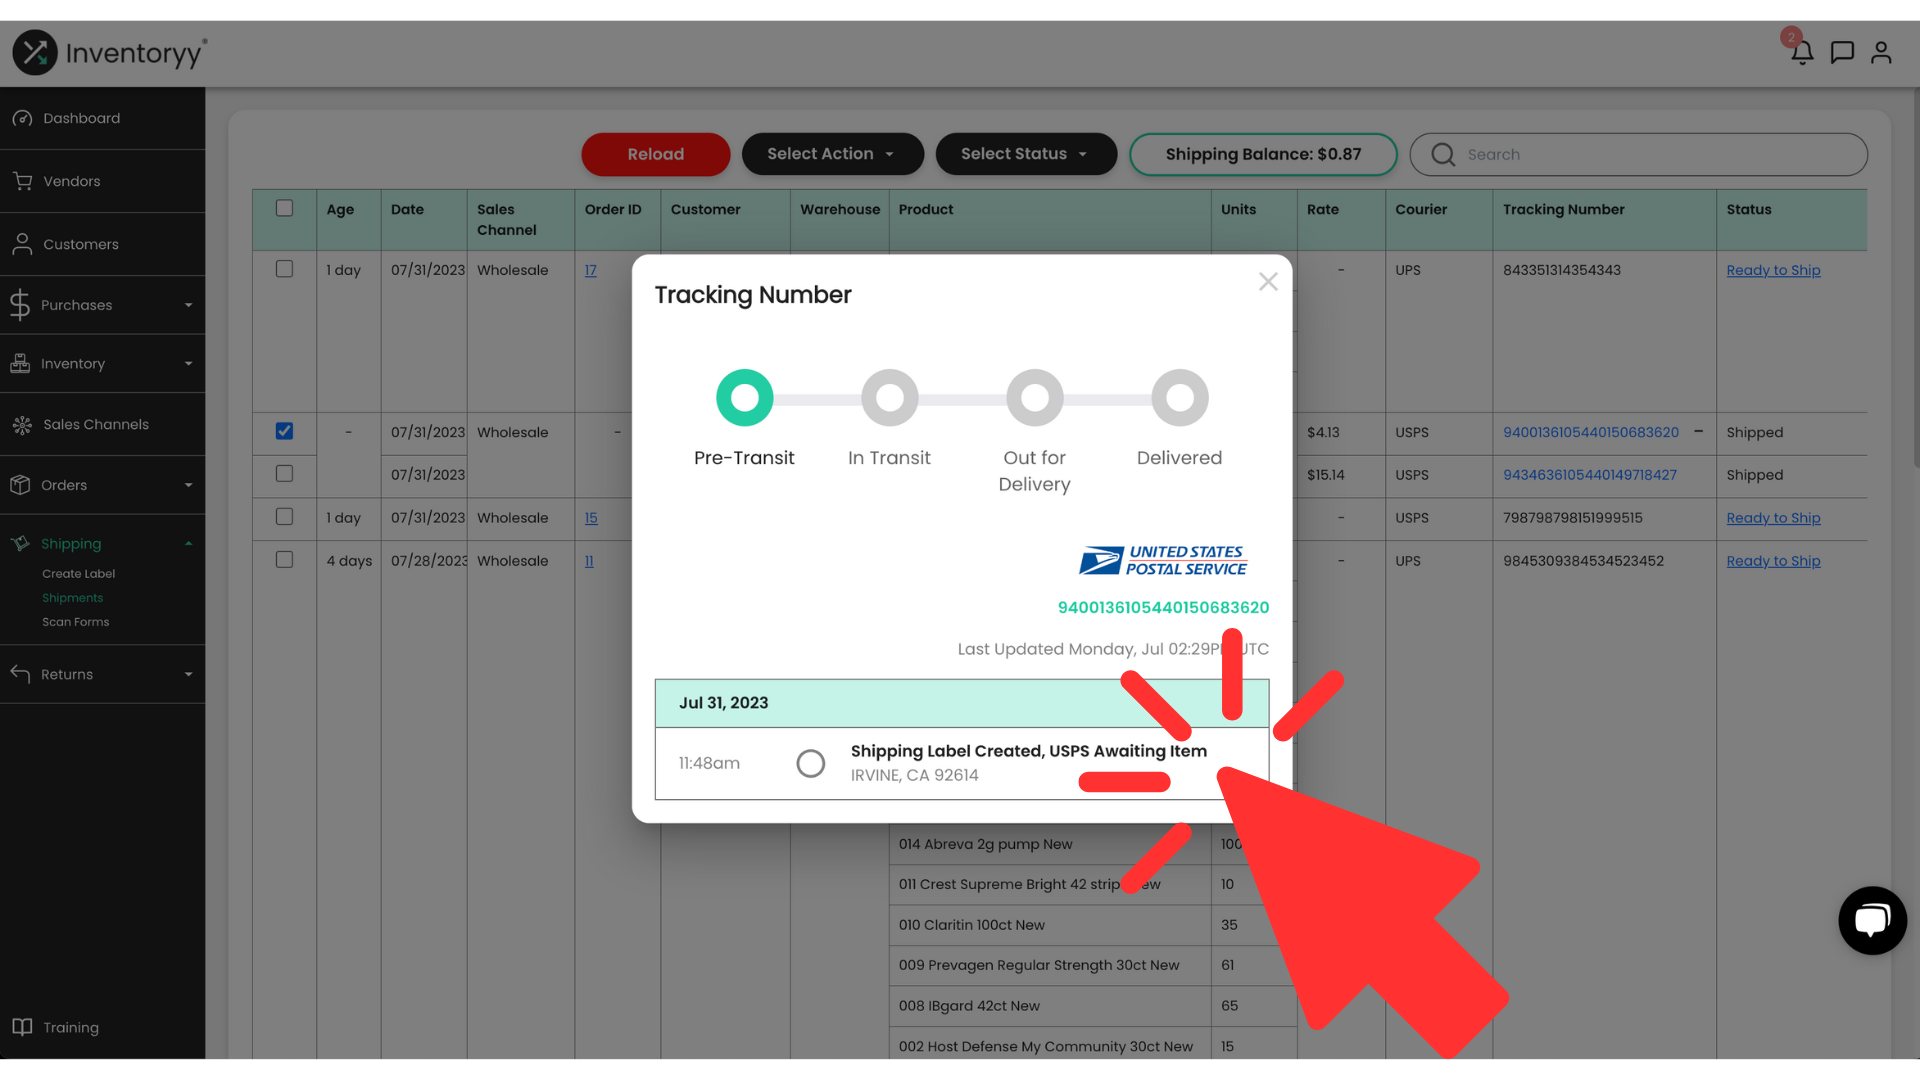
Track Shipment
Select the hyperlinked tracking number under the Tracking Number column to track a package.
Only shipping labels printed through Inventoryy can be tracked.
Scan Forms Page
Starting URL: inventoryy.com/inventory-management/scan-forms
From the dashboard, navigate on the sidebar to Shipping < Scan Forms
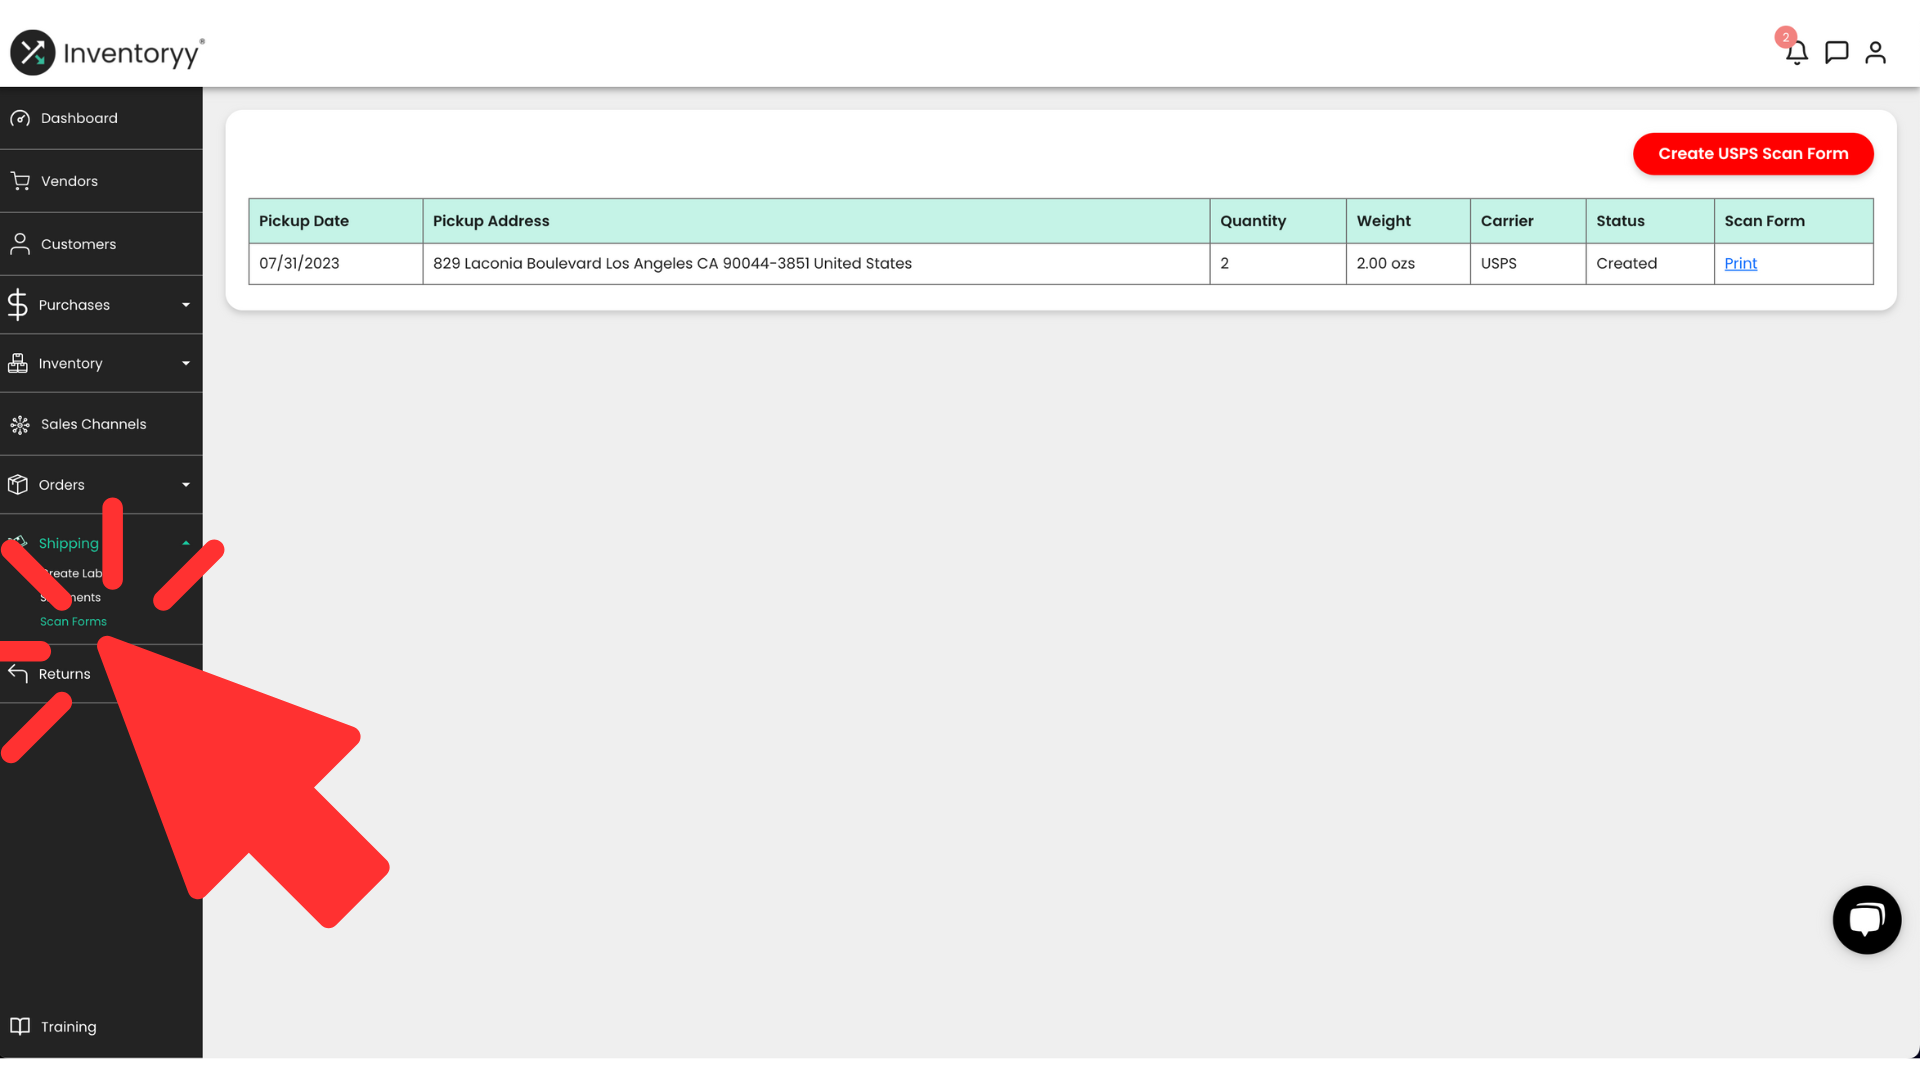
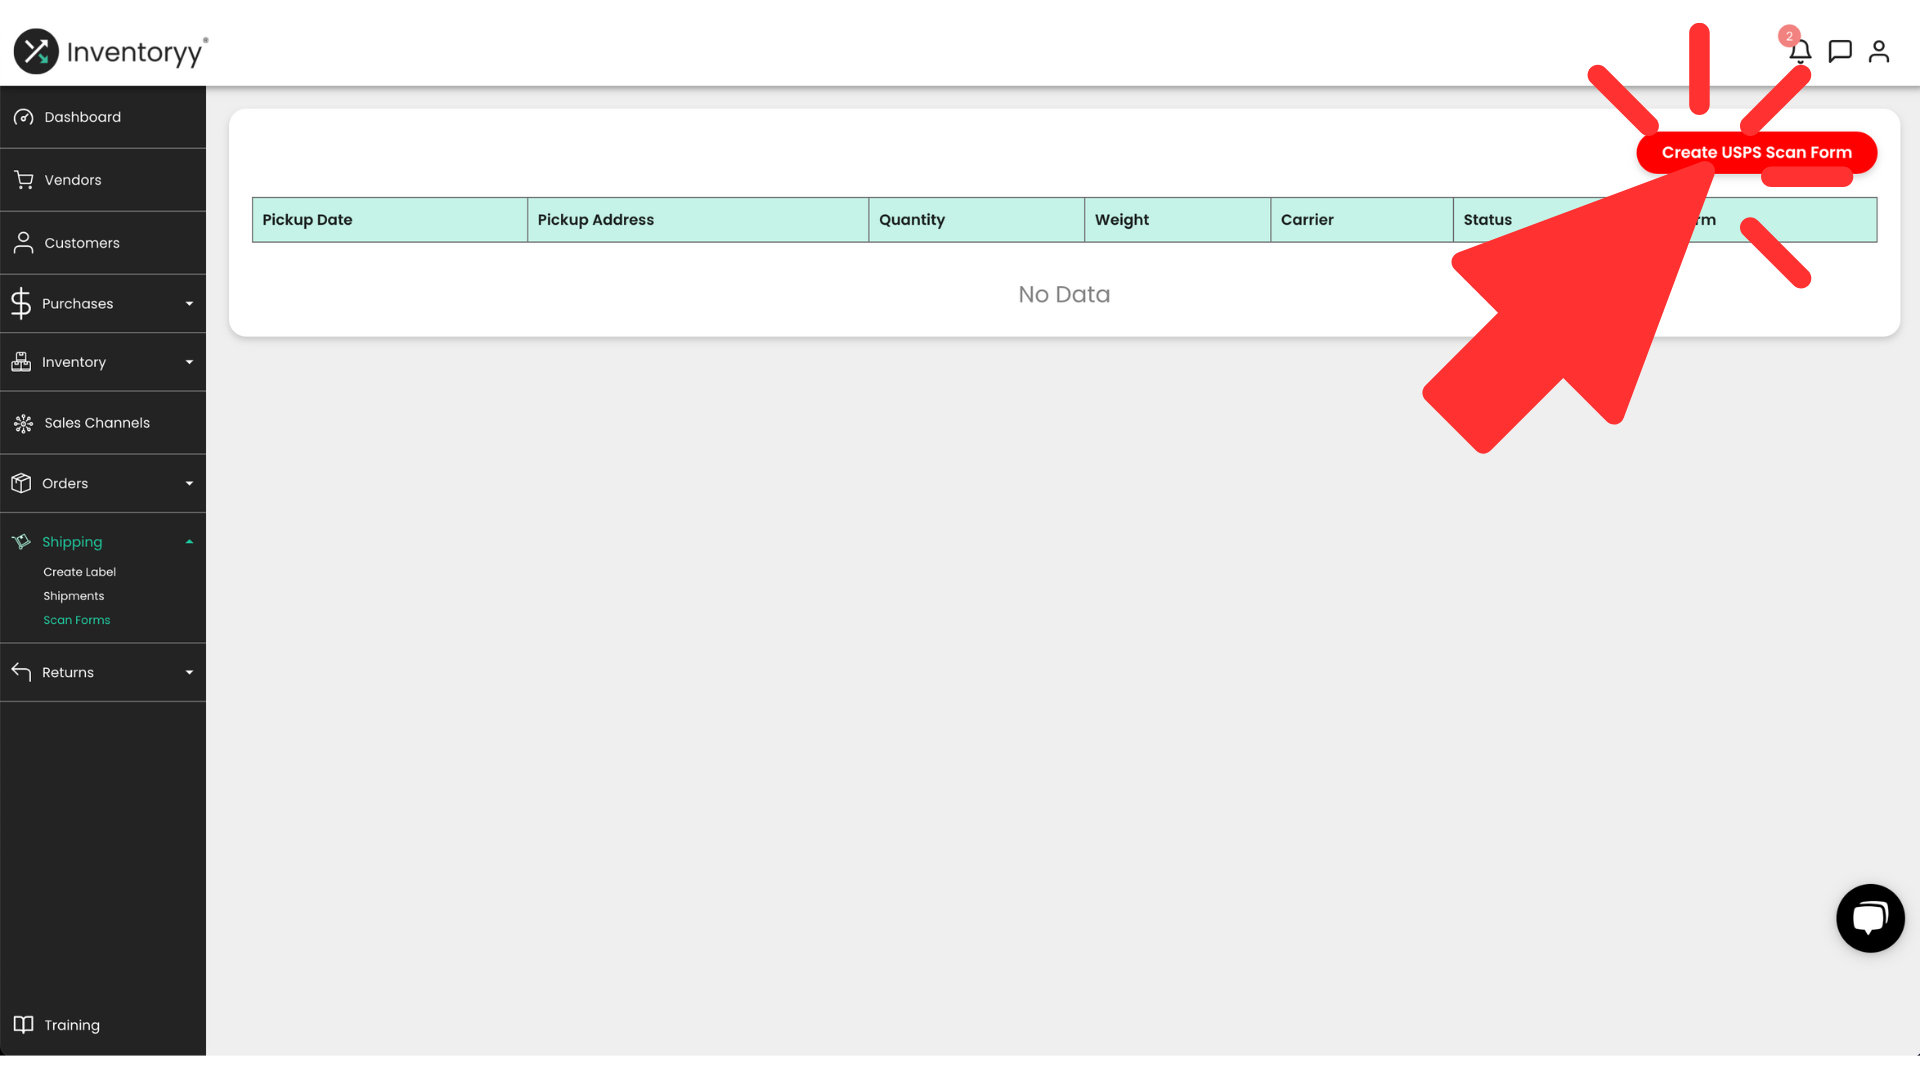
To create a USPS scan form for shipments going out that day, click on the red “Create USPS Scan Form” button in the top right corner of the Scan Form page.
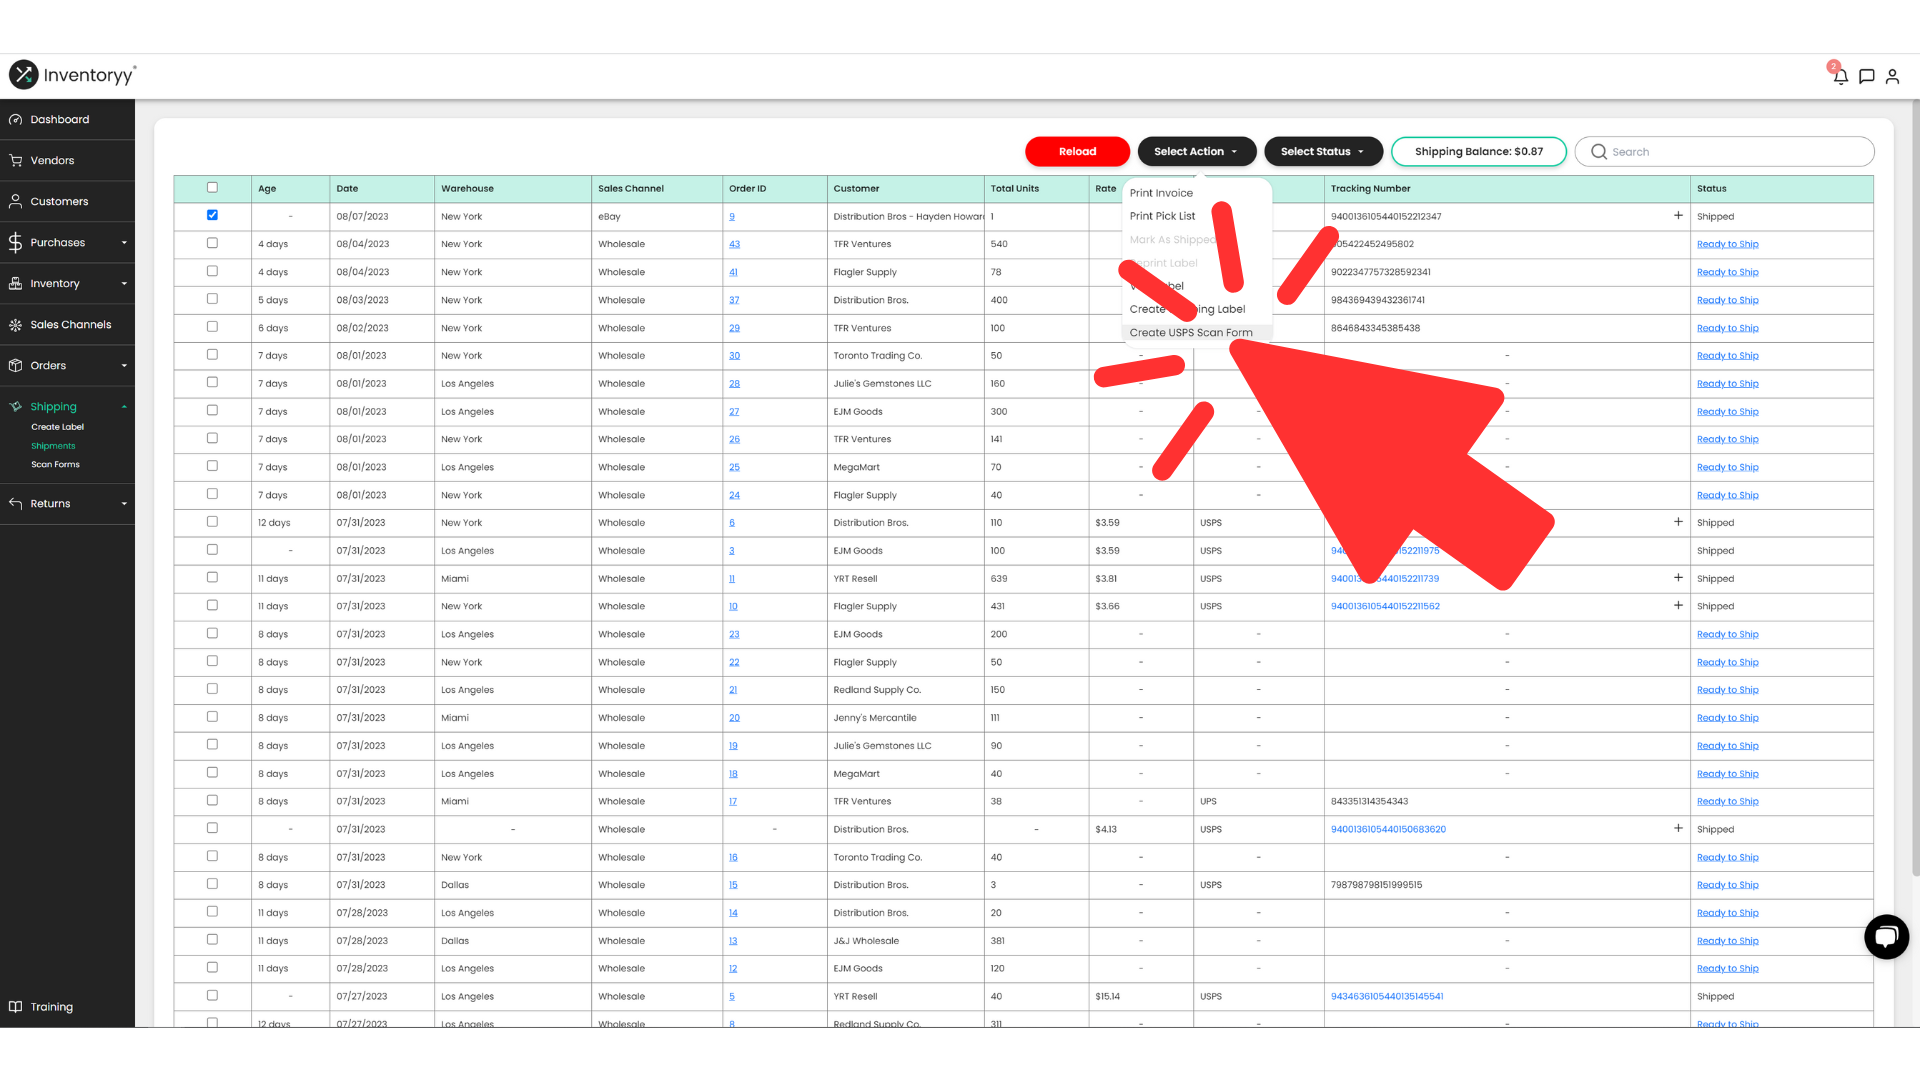
You can also create a scan form on the Shipments page by clicking on the black “Select Action” button, then clicking “Create USPS Scan Form” in the dropdown.
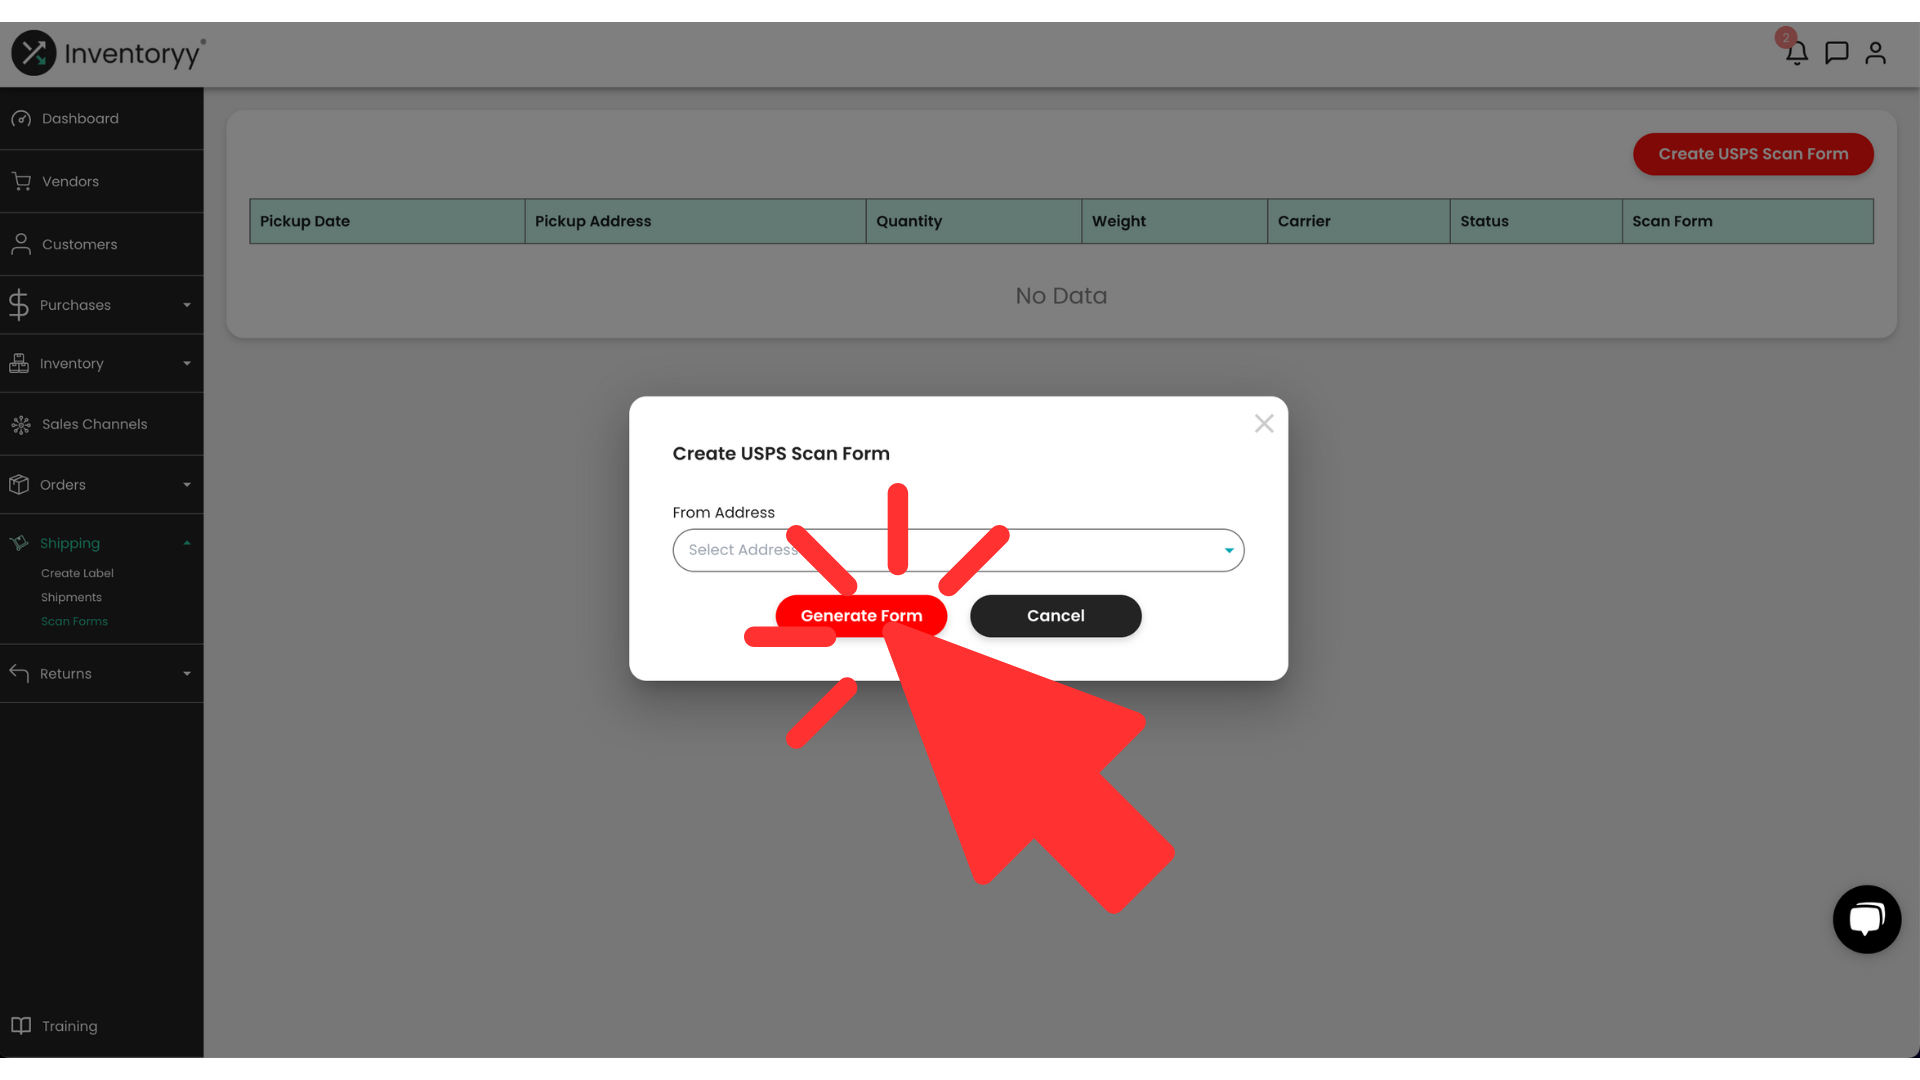
Create USPS Scan Form
Once you have clicked the red “Create USPS Scan Form”, select the From Address and click the red “Generate Form” button.
Pickup Date
Pickup Date column displays the date for the packages to be picked up (the same date as the scan form was created)
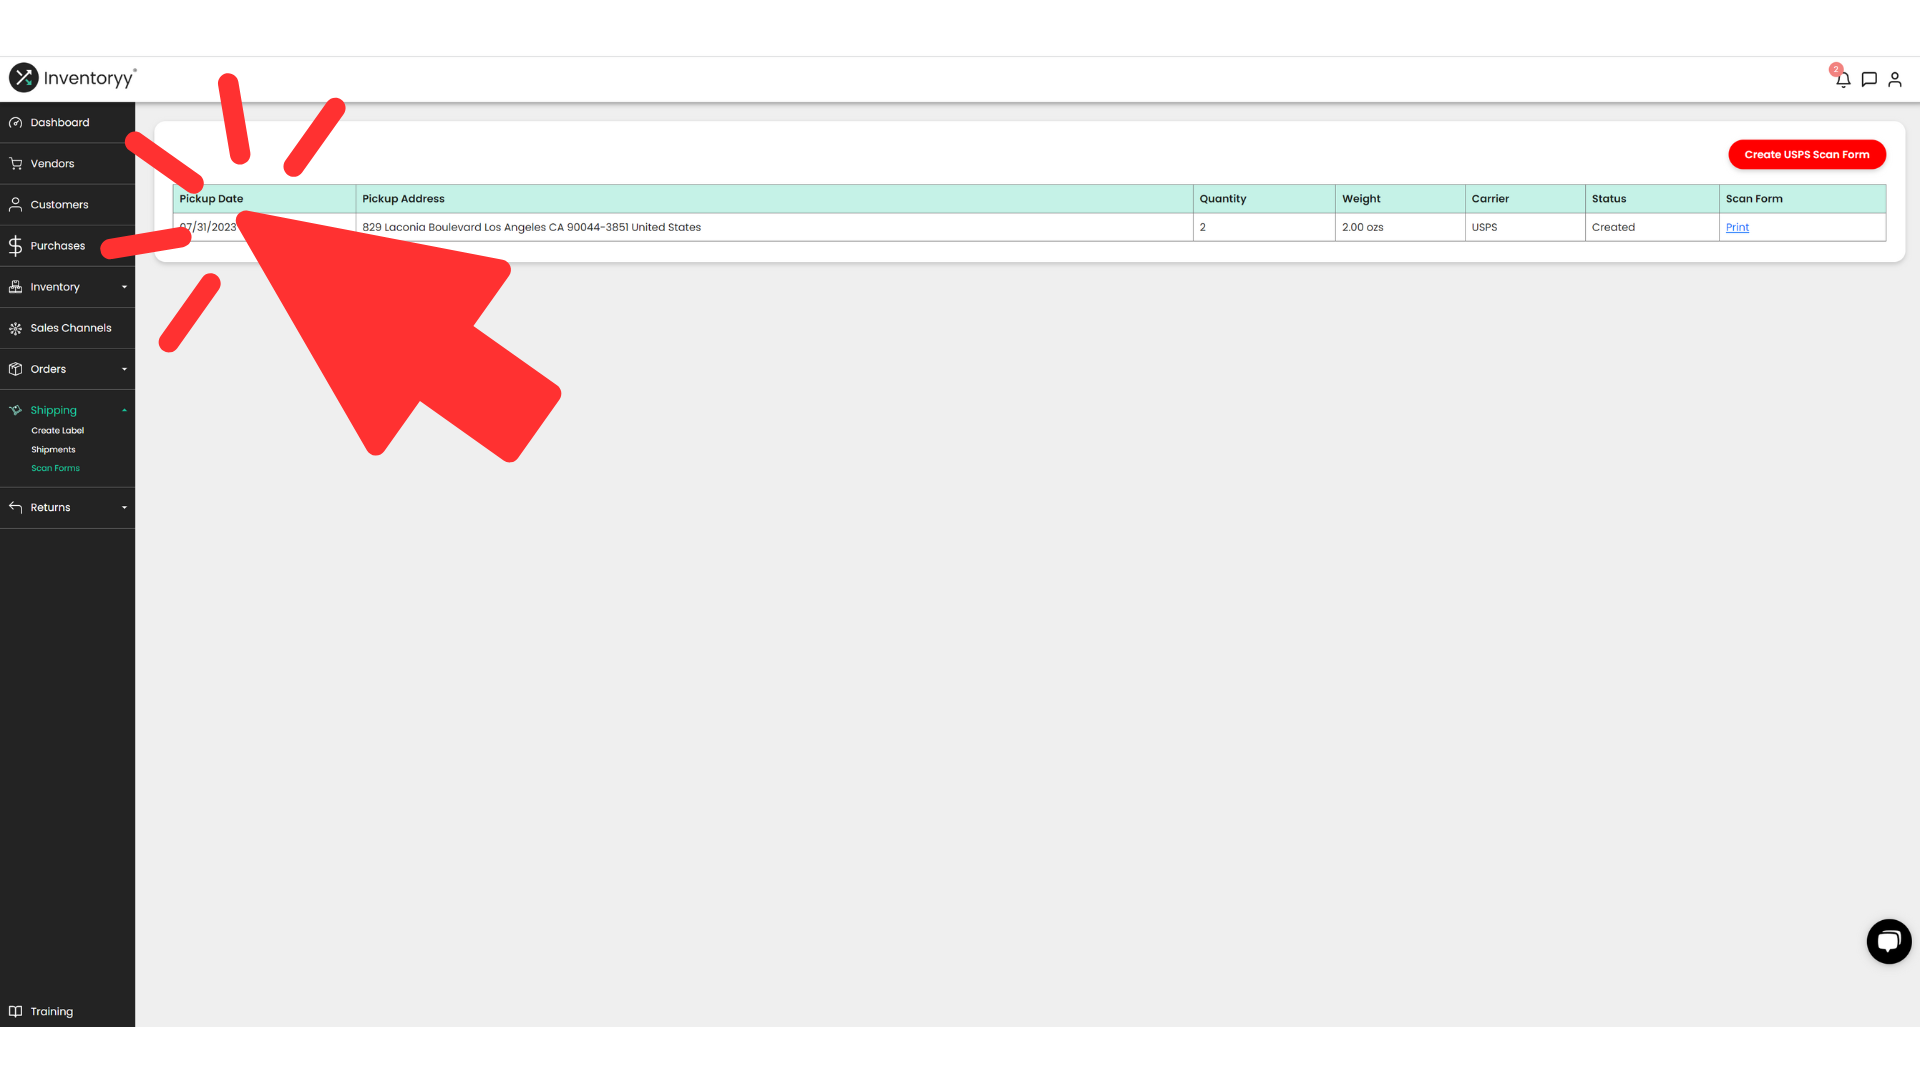
Pickup Address
Pickup Address column displays the address that the packages in the scan form will be picked up from
Quantity
Quantity column displays the total number of packages in the scan form
Weight
Weight column displays the total weight of the packages in the scan form
Carrier
Carrier column displays the shipping courier used to ship the packages in the scan form
Status
Status column displays the current status of the scan form
- Statuses include: “Creating”, “Created”, and “Failed”.
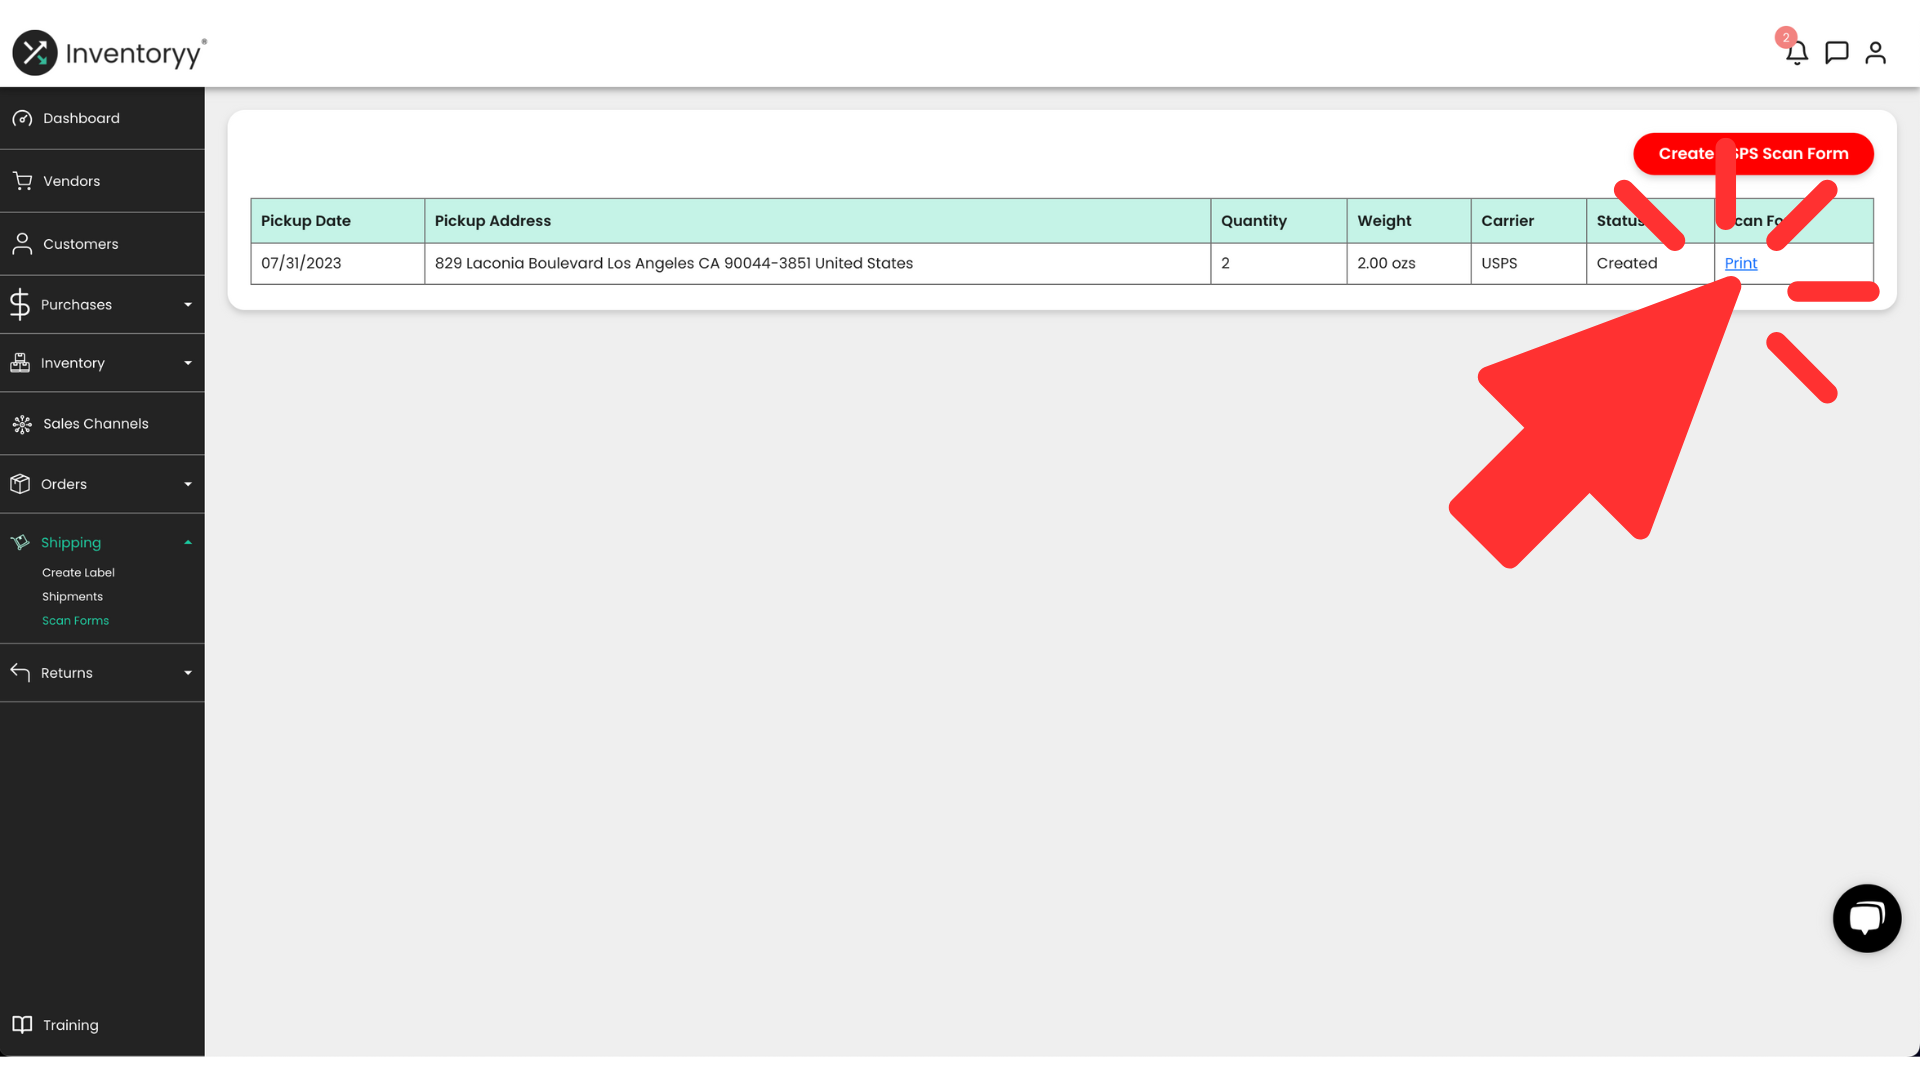
Scan Form
Scan Form column gives the option to print the scan form (hyperlink)
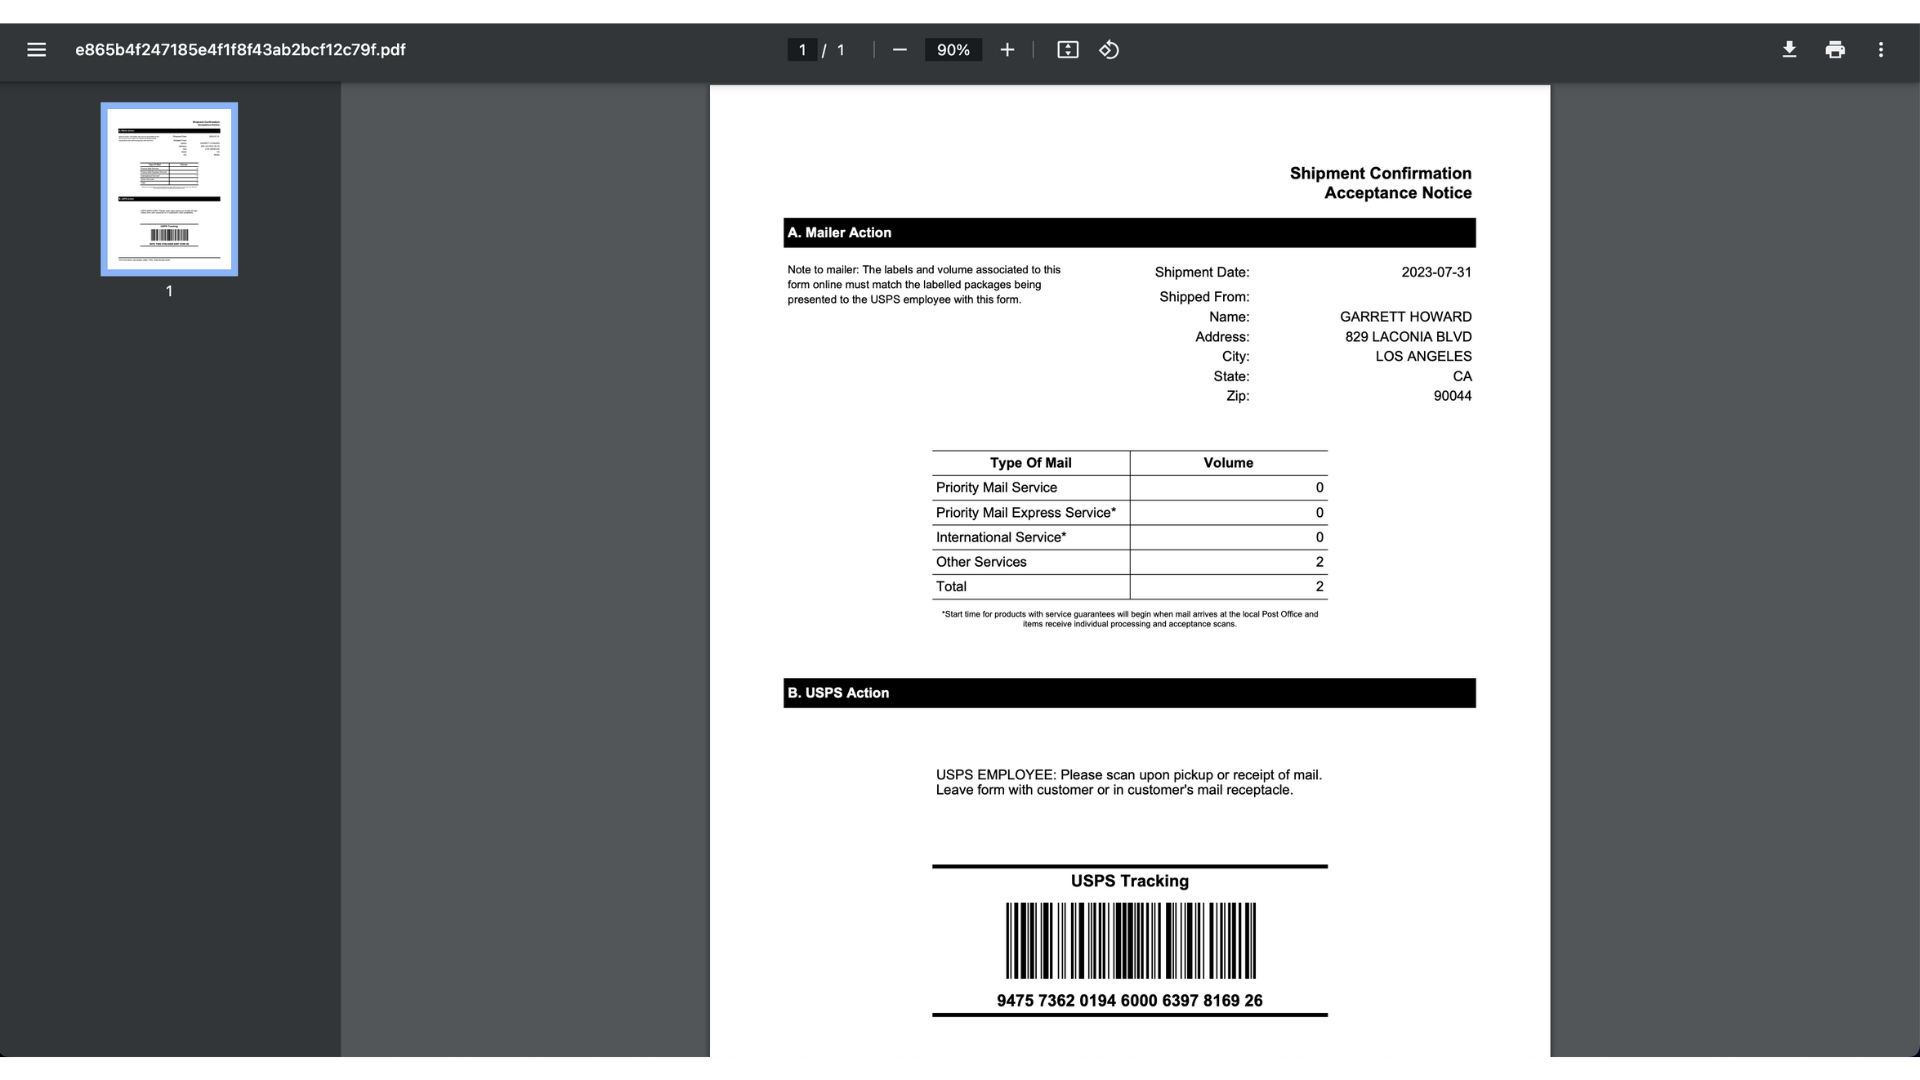
- Click the “Print” hyperlink to print the scan form