
Sync your sales channels, shipping couriers, and more with your Inventoryy account.
Start URL: inventoryy.com/my-account/integrations
From the dashboard, select “My Account” in the top right corner. Next, navigate to the sidebar on the left side of the page and click “Integrations”
Marketplaces
Shopify
- Select "My Account" in the top right corner.
- Click on "Integrations" from the sidebar on the left side of the page.
- Select “Shopify” integration under Marketplaces.

4. Input your Shopify Store URL then click "Add"

5. You'll authorize the Inventoryy app to connect to your Shopify store by clicking "Install"

Adding Additional Shopify Accounts
In order to add additional Shopify accounts to Inventoryy, do the following:
- Click on the Shopify icon on the Integrations page
- Click on "Add New"
- Log into the other Shopify account
- Grant permissions for Inventoryy to access your additional Shopify account

Banking
Plaid
- Select "My Account" in the top right corner.
- Click on "Integrations" from the sidebar on the left side of the page.
- Select “Add Bank Account” integration under Banking.

Press "Continue"
Enter your phone number and click "Continue" or "Continue as guest"

Select your institution
Press "Continue to login" and log in to your bank account

Confirm access to the accounts you are connecting and click "Continue" and your bank account will be connected
Inventory
Phonecheck
- Select "My Account" in the top right corner.
- Click on "Integrations" from the sidebar on the left side of the page.
- Select “Phonecheck” integration under Payments.

4. Enter your Phonecheck Username and API Key, then click "Add"
Usernames are assigned by your Phonecheck account manager. If you do not know your username, please contact Phonecheck directly.
Access your Phonecheck API Key here: https://cloudportal.phonecheck.com/cloud/setting/ApiKey


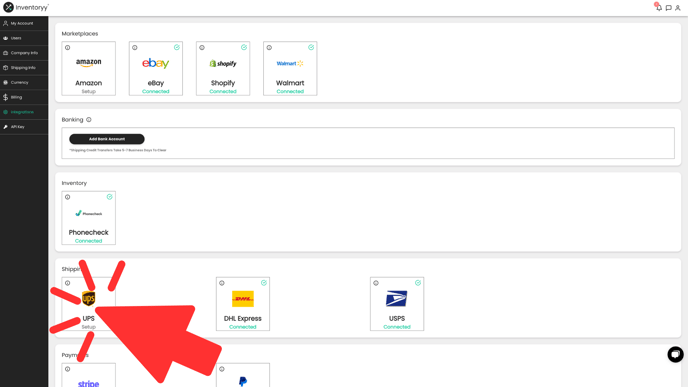
Shipping
UPS
2. Click on "Integrations" from the sidebar on the left side of the page.
3. Select “UPS” integration under Shipping.
4. It will ask you to log into your UPS account by entering your login credentials on the UPS login page. Once logged in, you will be prompted to approve access for Inventoryy to connect to your UPS account and will be taken back to Inventoryy. 
5. Verify your UPS Account Number and click on "Done".

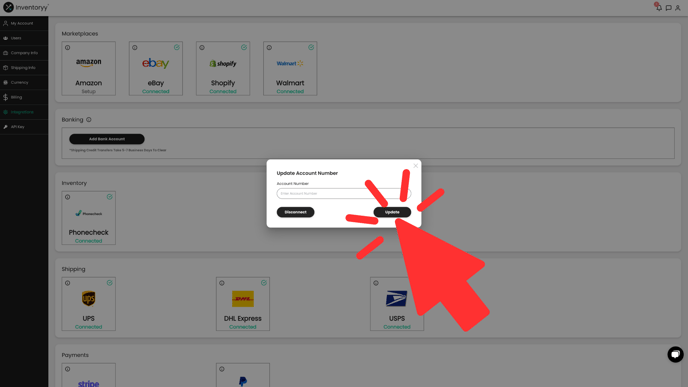
Change UPS Accounts
In order to change or update your UPS account to Inventoryy, do the following:
Click on the UPS icon on the Integrations page
Enter in the new UPS account number
Click on "Update"
Grant permissions for Inventoryy to access the new UPS account
USPS
The United States Postal Service (USPS), also known as the Post Office, U.S. Mail, or Postal Service, is an independent agency of the United States federal government responsible for providing postal service in and outside the United States.

Account Setup
Inventoryy offers instant access to USPS commercial discounts with no hidden costs, minimum volumes, or commitments of any kind.
Inventoryy accounts come fully integrated with USPS.
DHL
DHL is an American-founded German logistics company providing courier, package delivery, and express mail service, delivering over 1.8 billion parcels per year.
Account Setup
Inventoryy offers instant access to DHL commercial discounts with no hidden costs, minimum volumes, or commitments of any kind.
Inventoryy accounts come fully integrated with DHL.
Payments
Stripe
- Select "My Account" in the top right corner.
- Click on "Integrations" from the sidebar on the left side of the page.
- Select “Stripe” integration under Payments.

4. Enter the email address for your Stripe account then click "Submit"

5. Enter your password and click "Submit"

6. Add public details for customers then click "Continue"

7. Review your information then click "Agree and Submit"
